

Whilst most of us have a personal Facebook profile to interact with friends and family, a business requires a Facebook Page.
You may not know this, but Facebook doesn’t like you using your personal profile for business purposes and frankly you’d be limiting your options if you were.
Firstly, you run the risk of having your profile canceled by Facebook if you are using it for business purposes, but more importantly a Page allows you many more options such as unlimited fans, the option to advertise, and page statistics.
If you don’t have a Facebook Page for your business yet, I recommend setting one up today.
In this post I’ll walk you through how to set up your page in 5 simple steps.
Let’s start with what you need to setup your Facebook page:
- A name for your page and a little blurb about your business so that people can find your business and learn more about what you do.
- A profile and cover photo. You can use your logo or a photo of you as your profile photo and for your cover photo I recommend using an image that represents your business or the product/service you sell. Think of it as a mini advertising space.
- A call to action, which focuses on what action you want people to take when they are on your page. These could be things like visiting your website, signing up to an offer or calling you.
Now that we’ve prepared we’re ready to create your page.
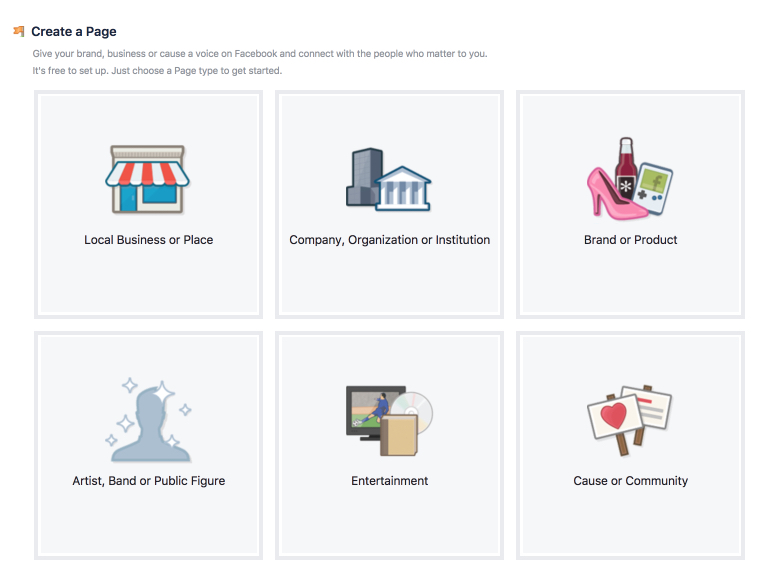
Click Create Page to get started.
Step 1: Choose your business page type
Step 2. Complete your basic information
For this step you can refer to your prep work as it includes adding your business name, your blurb and your images. Facebook will guide you through these steps, just follow along and you’ll be ready to hit publish page soon.
Step 3. Navigating and admin skills
The basics of your Facebook Page are now setup and live. The next step is to familiarise yourself with the admin panel.
Firstly, Facebook will ask you if you want to like your page. I suggest leaving this until later as liking your own page will show up in the news feed of your personal contacts. Without any content on your new page it is better to wait until you’re ready for your friends and family to see your new page.
In the top navigation you’ll see a ‘settings’ option. In here you’ll want to focus on updating your page info. Add additional details about your business to inform your new fans about what you do, how they can contact you etc.
There are other options here too, have a look around to familiarise yourself with what is possible on your Facebook Page.
Step 4. It’s content time!
Now you’re ready to start filling your page with joy, I mean content.
When posting on your page, be sure to post a variety of content. What images would your fans like to see? What information would they like to read? What links would they like to click?
On the top of your post you can click the little grey arrow and then click “Pin to Top” to move one of your posts to the top of your Page’s Timeline for a week. This feature is great for product announcements, important notices, offers and other events.
Hurray there’s content on your Page! Now we can start inviting people to Like it. I recommend inviting business buddies, people you have met in Facebook groups, your customers and perhaps even some family members. The main thing is that you want to invite people who will engage with your content as Facebook uses engagement as a measure of success.
With content published and fans invited, you can now go to the “Activity” tab in your Page’s top navigation to keep an eye on how people are engaging with your Page and content.
Step 5. How are you doing?
Not literally, I mean your page.
Once everything is setup and you’ve posted content for approximately a week you’ll want to measure your efforts to ensure you’re making valuable marketing decisions on Facebook. The fabulous thing about Facebook is that it has embedded in some helpful metrics for you to monitor.
Head on over to the “Insights” option in the top navigation to check:
- Overview: This tab shows a 7-day snapshot of your metrics such as Page Likes, post reach, and overall engagement.
- Likes: This tab shows your overall fan growth and losses. If you’re using paid options, you’ll be able to see the breakdown of paid versus organic growth.
- Reach: This tab highlights the raw number of people your Page is reaching every day. If you notice spikes on a specific day, try cross-checking what you posted that day to see if you can replicate that reach.
- Visits: This tab indicates where on Facebook your viewers are coming from. You can see the difference in visits on Facebook Timelines, your information tab, reviews, and others.
This last point is particularly important for us business owners, after all we want to make sure that our efforts are paying off and if not, we can use the data to make better decisions.
Now that your Facebook Business Page is setup, go ahead and fill it with beautiful content your fans really want to see and engage with. Once you’ve done this for a while and you’re getting great results and engagement you might like to try Facebook Advertising.

