

Do you think your business could benefit from Facebook ads? After all, everyone is talking about how much their businesses grow after running ads.
But how do you know if you’re ready?
How do you get started with Facebook ads?
What exactly do you need to get started?
Venturing into the land of Facebook ads can feel a bit daunting. It’s something new and something that often takes some time to learn.
Knowing where to start can be a great help, but it can also bring up more questions. I just want you to know that this is completely natural. Every time you encounter something new, you’ll feel like you’re in a maze that at the moment you struggle to get out of. Facebook ads can feel like that too, especially at the beginning but trust me when I say that there is a way out and I’m here to guide you safely (and successfully) to the exit.
In this post I’m going to guide you step by step through the maze of getting started with Facebook ads. We’ll start at the very start, so if you’re new to business or your business only just moving online, this step by step post will be perfect for you.
Step 1: Create a Facebook Fan Page
If your business doesn’t have a Facebook Fan Page and you only have a personal Facebook profile, you must create a fan page first. Facebook ads can only be linked to business fan pages, not to your personal profile even though you’ll access your advertising dashboard from within your personal profile and your payment details will be linked to your personal profile.
Firstly you need to go to facebook.com and create a personal profile if you don’t already have one. The next step would be to create a page and select an option for your business. You can select from six different options at the moment. I suggest choosing one that most resembles your business if you’re unsure of what to pick.
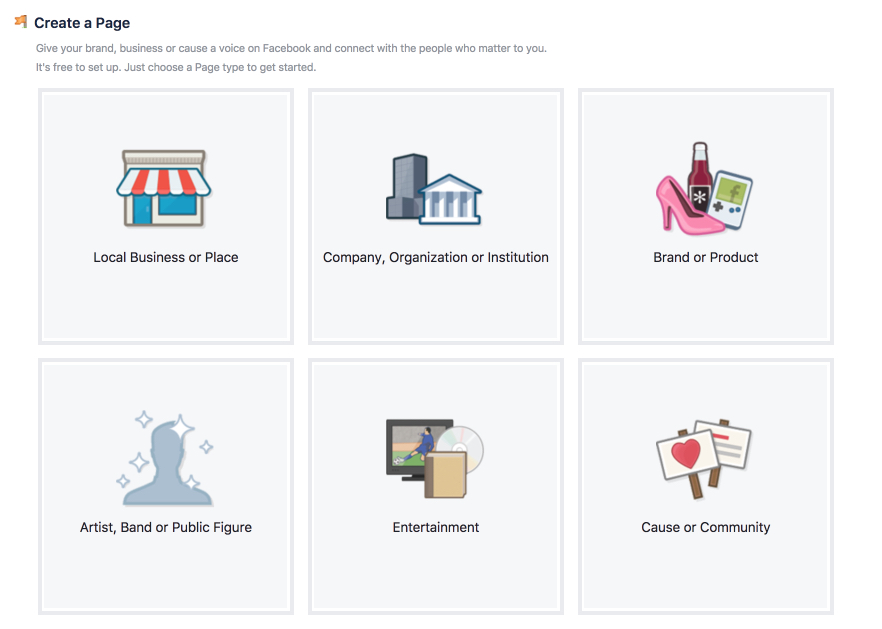
After that you’ll need to select a category and write down your name.
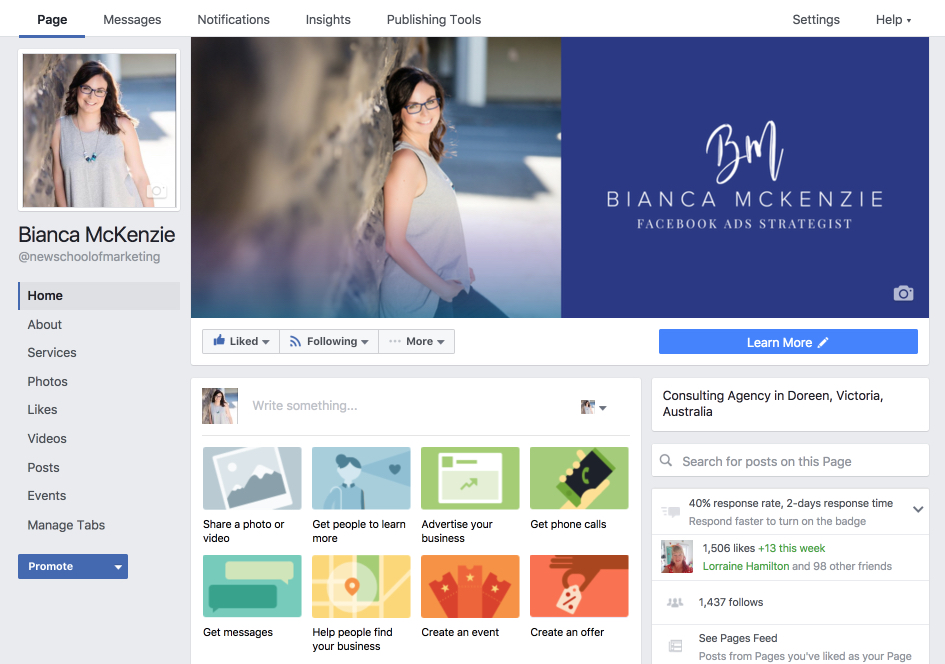
The next step is to fill in some more details and come up with the name for your Facebook fan page. You can’t easily change this so be sure to name it something that will last. Your business name is often a good idea but sometimes this isn’t available, I wanted to set my page to have to URL and name ‘Bianca McKenzie’ but it clashed with my personal account and Facebook didn’t want me to use it so I settled for ‘New School of Marketing’.

There are a few more steps to take like putting in your profile picture, setting it to your favourites, and adding your prefered page audience. I suggest selecting the country and age group of your ideal clients.
Under interests you can select likes that they share with you or your business. For example, you could select other influencers in your industry, or products, companies, newspapers they might read etc.
Save it and you’ll be taken to your brand new page!
You’re technically ready to start creating ads, but there’s two things you should do first. Create and upload a cover photo for your page and determine a call to action. Canva is a great tool to create a Facebook cover image and they have a template that you can use in the correct size.
Your cover is like a large advertising space to showcase your business and it should be simple, exciting and recognizable. You can upload your logo or an image that represents your business. Just make sure it’s high resolution.
In terms of your call to action, Facebook gives you some options to choose from depending on your goal.
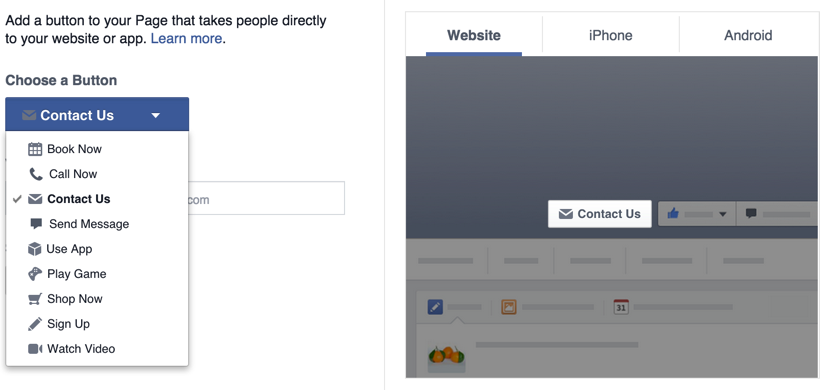
Once you’ve set your call to action, you’re ready to start your ads.
Step 2: Create your first advertising campaign
Firstly, you need to go back to your personal profile to get to your ads manager.
On the right hand side you’ll find a drop down menu where you can select create ads or manage ads. Select either of them and you’ll be taken to ads manager.
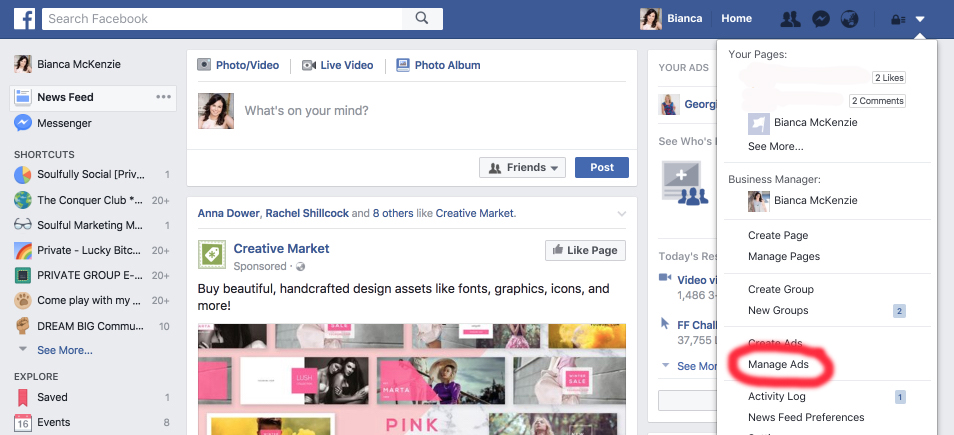
Once you’re in ads manager, you can start creating your ads.
Note: You’ll hear a lot of people talk about Power Editor, and whilst I recommend this tool, I suggest you start in Ads Manager if you’re completely new to Facebook advertising.
Once you start ads manager you might see one of two screens.
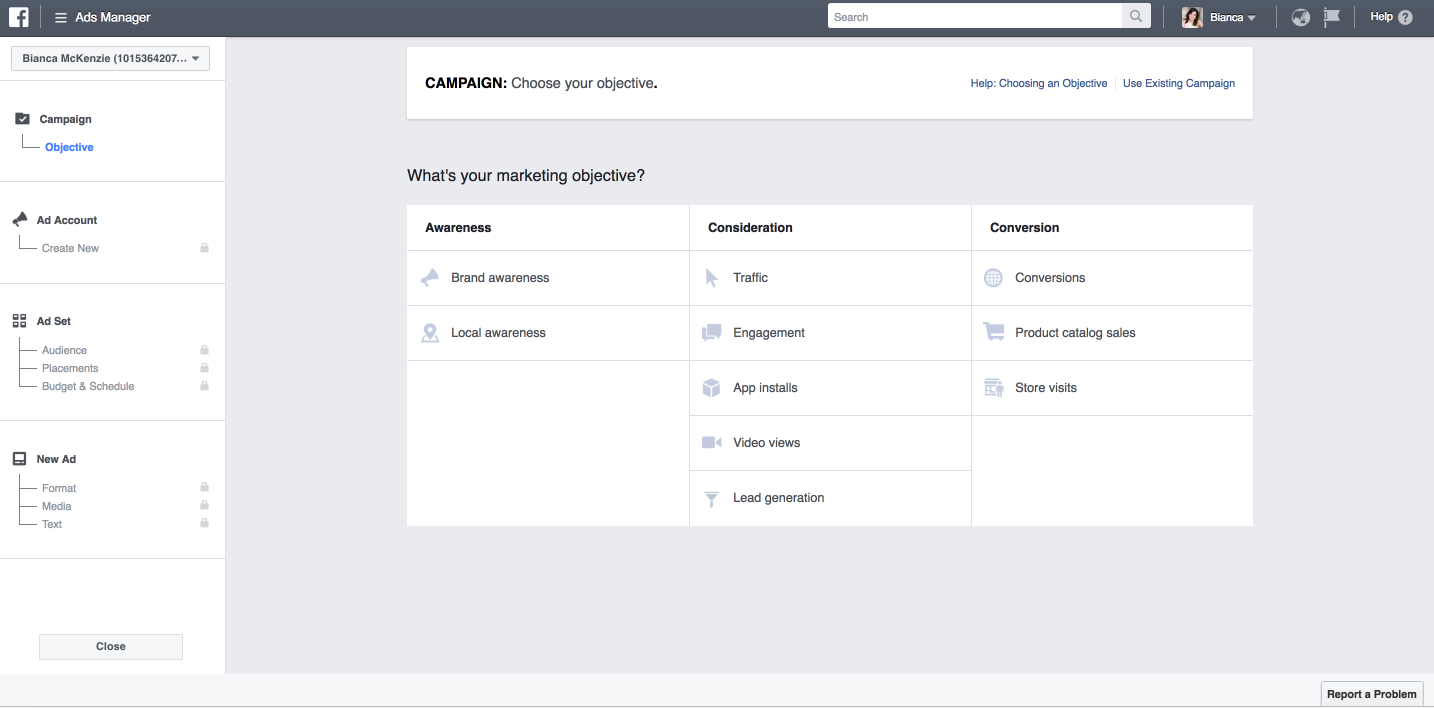
Either are fine to begin with… they just take a different approach in setting up your ads.
For the first option, you start by selecting a conversion option. Because we’re starting simple (remember, this is your first ever campaign) we’ll select ‘traffic’.

Then we give our campaign a name, for example ‘website traffic + month + year’.
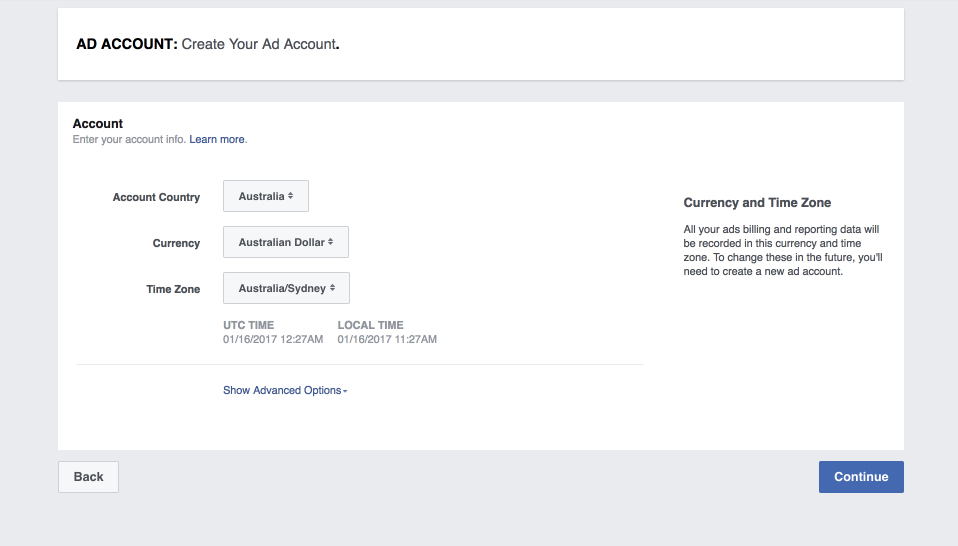
Because we’re using a new account, you’ll have to setup your ad account first.
Step 3: Create your ad set
The next section is your ad set, this is where we choose who we want to show our ads to.
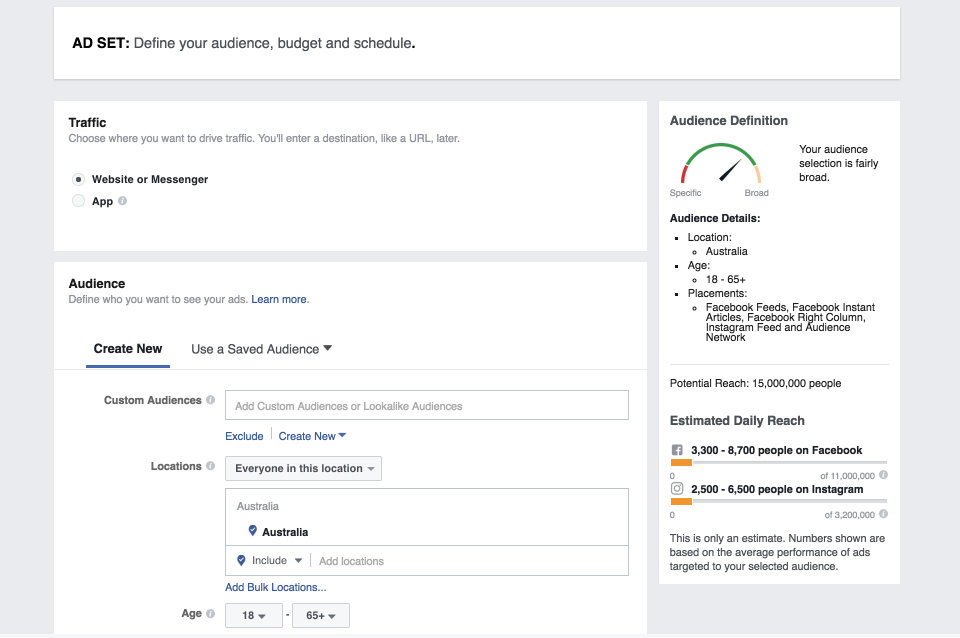
You’ll notice that you have a lot of options and I suggest that you change as little as possible in the pre-set parts.
In this section you need to determine your audience and as a rule, the narrower your audience, the better. The example above shows Australians aged 18 – 65+ which adds up to a potential reach of 15,000,000 people. This is much too broad for your ads to be effective.
Narrow your audience age down to your ideal target group. For example my target audience is often females aged 28 – 34. Putting in this filter narrows my audience to 1,400,000 which is still too broad.
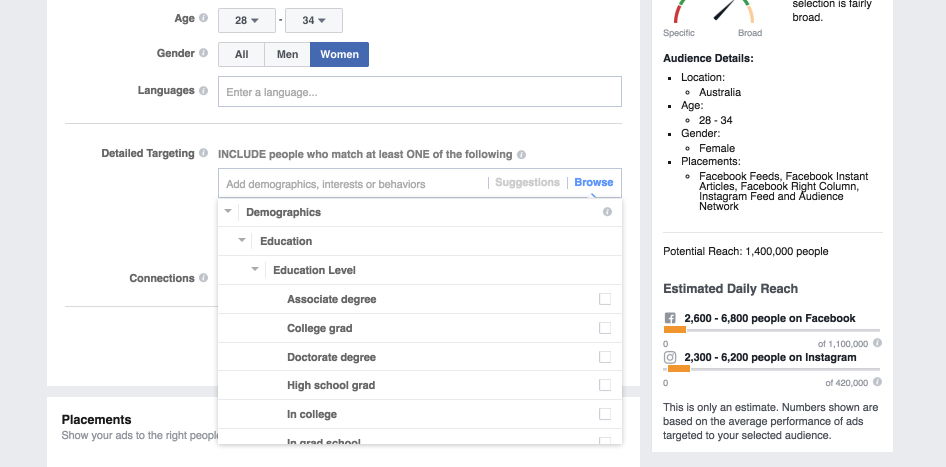
Use the interest section to make your audience even more specified. For example, I could target high school grads who are single.
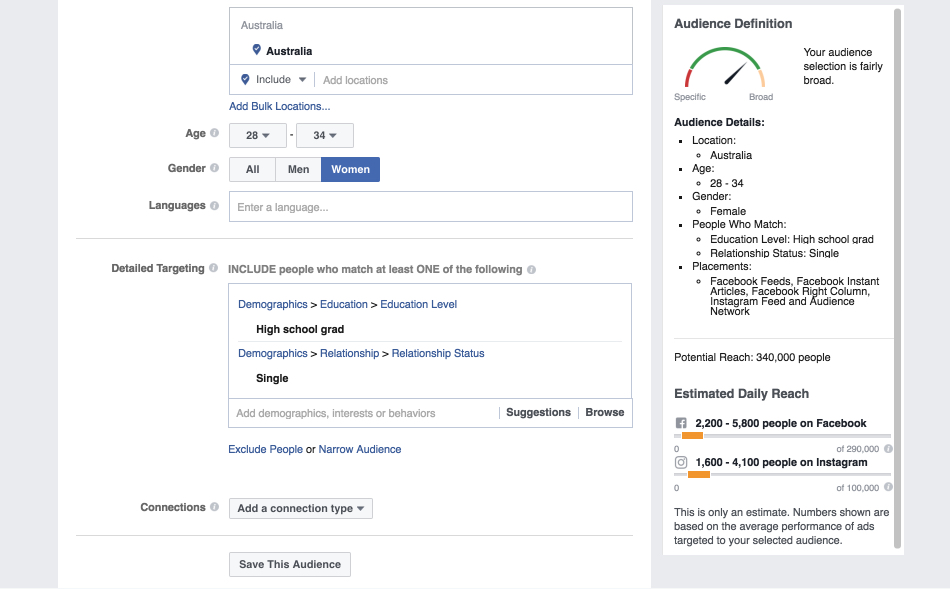
Aim for a potential reach of approximately 300,000 or smaller.
You can get very specific in targeting the right audience and a favourite trick of mine is to select pages that my audience might follow. For example, if you know that the majority of them watch a certain TV channel or read a certain newspaper or follow a certain celebrity, you can target those pages.
In the example below I’m targeting fans of the TEN Eyewitness News show.
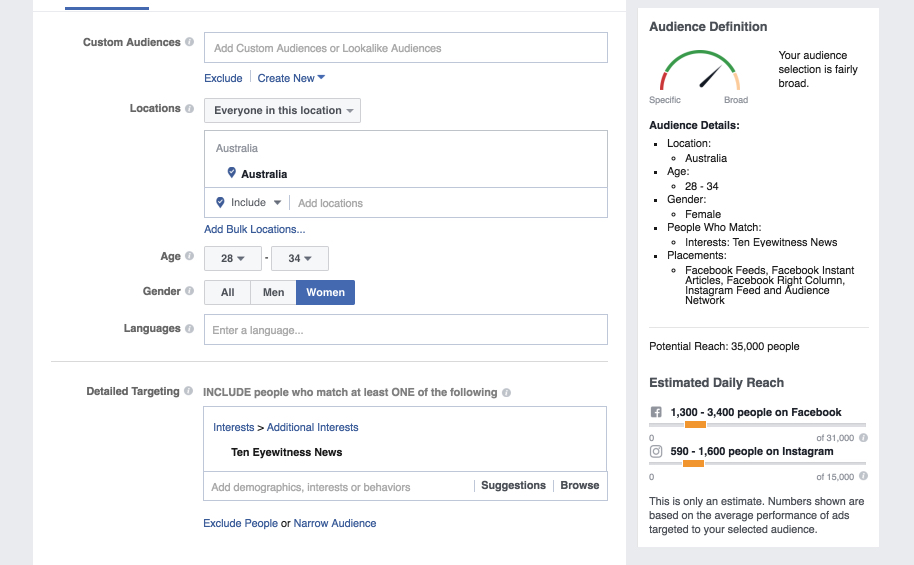
Next up you can change the placement, which is where your ads will be shown. If you’re not comfortable changing this yet you can leave it and it will show up in newsfeeds, on instagram, and in third party articles. I recommend disabling everything except for the Facebook News Feed. Having your ads show up in the newsfeed only will help you get better results that you can track more easily.
The next step is to set your budget.
Start small, with approximately $2-$5 per day but make sure you set an end date to your campaign. I suggest somewhere between 2 to 4 weeks.
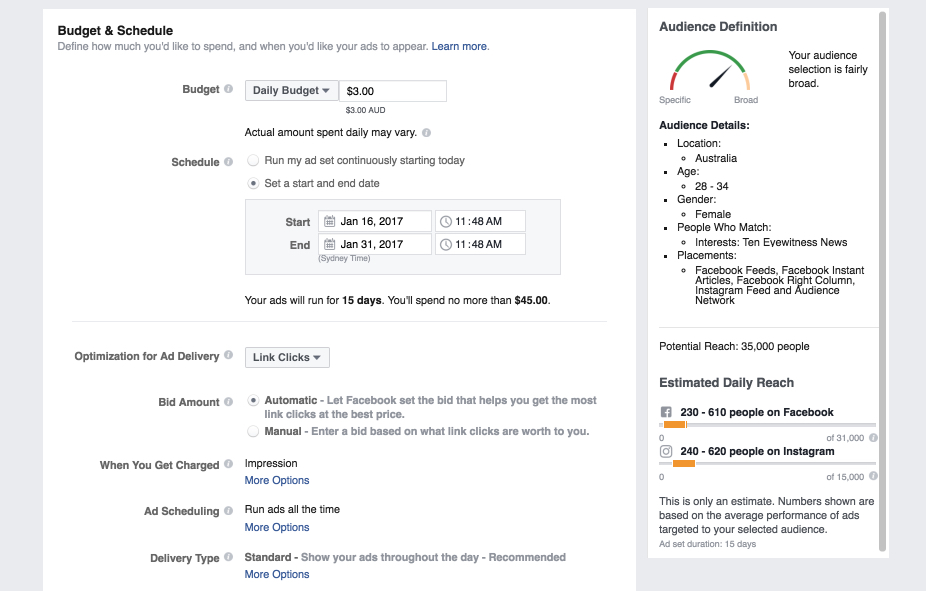
Now give your ad set a name that is logical to you. I often name my ad sets after the group I’m targeting, for example ‘Ten eyewitness news target group’.
Step 4: Create your ads
For your first ad campaign we’ll keep it simple and select to use a single image.
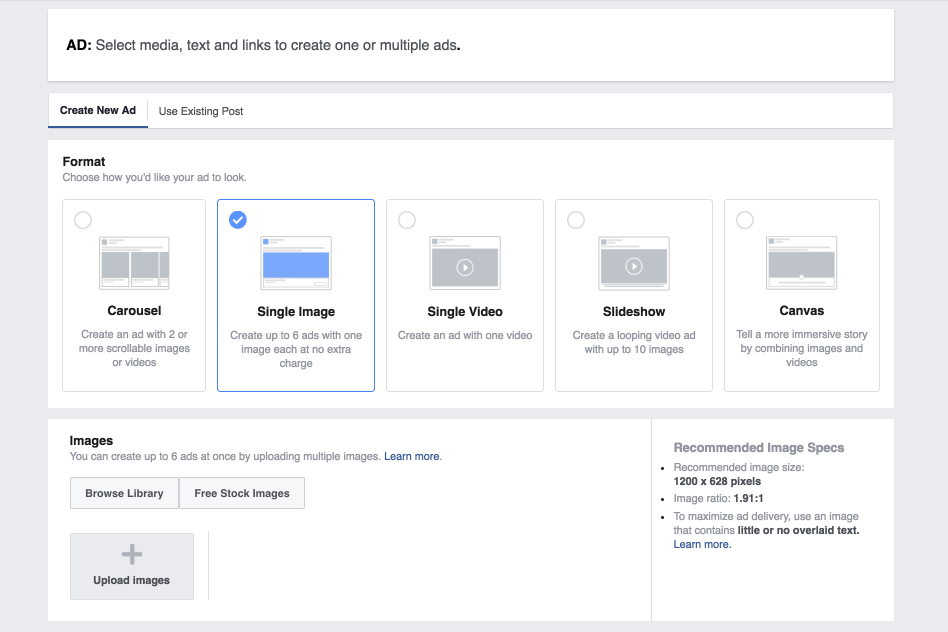
You have the option to upload your own pictures or browse free stock images. I suggest using your own images, even if they are sourced from stock libraries.
It’s best to upload more than one image so that you can test what is resonating with your audience. You may have heard of split-testing or A : B testing, which is where you give your audience more than one option to see what works best.
Start with three different images so that you can test which one of the images gets better results.
Also pay attention to the little sidebar as it shows the guidelines for your image. Make sure it’s the correct size, which is 1200px x 628px.
If you’re going to put text on your image, don’t put too much on it. There used to be a rule that allowed only 20% of the image to be text and although Facebook doesn’t enforce this rule anymore they will still penalize you for having too much text.
Once you have uploaded your image, you’ll see a preview appear. It’s now time for you to get your text ready, put your website URL in and choose a CTA (Call To Action).
Your headline is the bigger, bolder text underneath your image.
The newsfeed link description is the smaller text that goes underneath your headline.
Text is what goes above your image and your CTA can be chosen from a list of pre-sets.
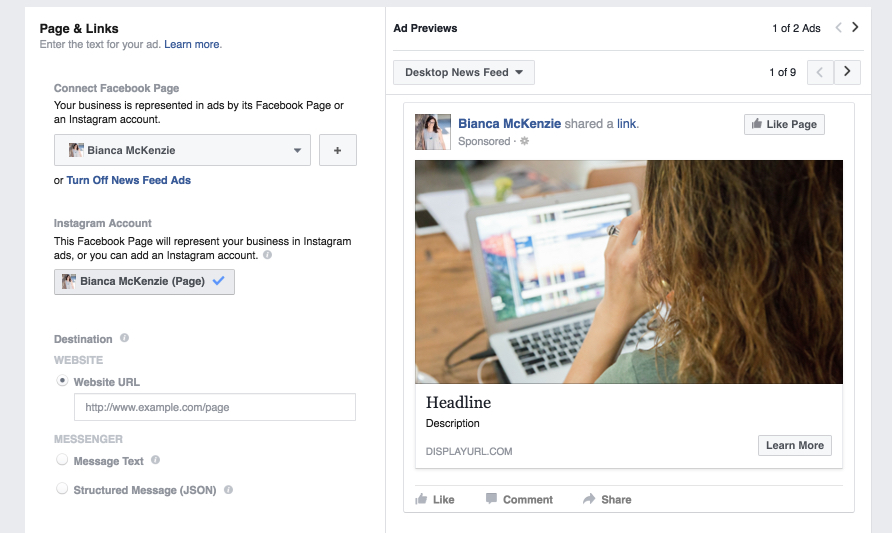
Headline: This is where you give your prospects something for free, for example a free webinar or download. Make sure that your headline is attention grabbing.
Text: The aim is to make this compelling and add a call to action as well as some social proof.
Newsfeed Link Description: Give your readers another call to action reminder and why it benefits them to click/read/sign up etc.
CTA button: The ‘Learn more’ button has been proven to convert best.
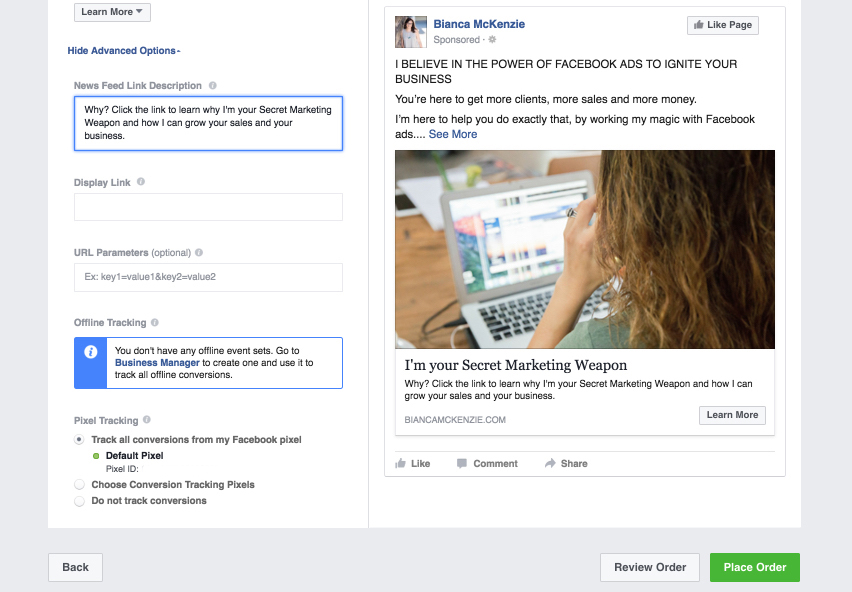
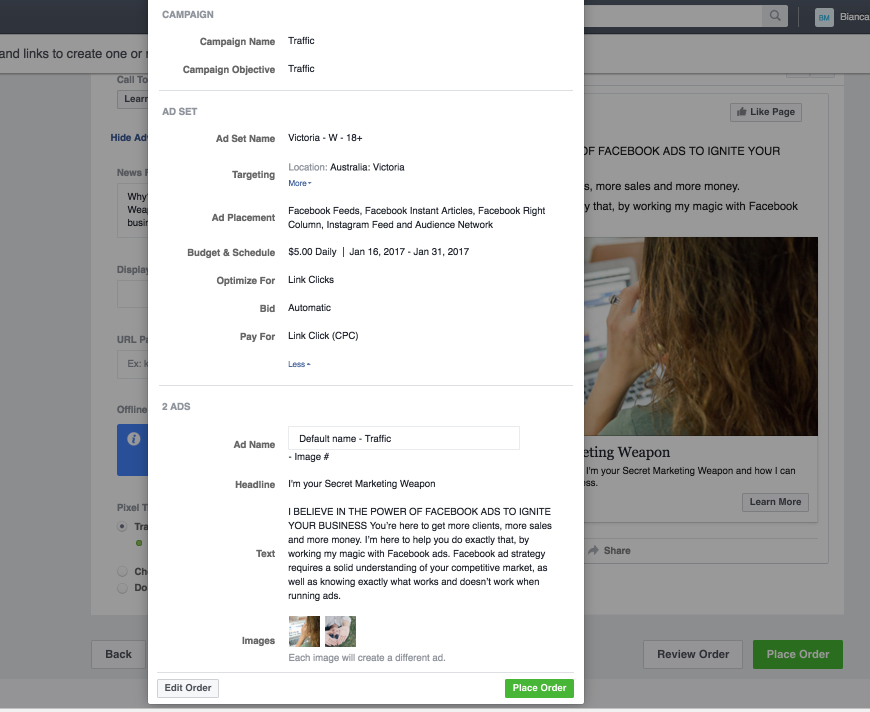
You’re almost done now. Scrolling down gives you the option to review your order or place your order.
If you’re certain that you’ve completed everything as you wanted, you can place your order. If you want to check what you’ve put in, choose to review your order. This is also the part where you can name your ad. I often name my ad after the image it shows, for example ‘Woman on laptop’.
You’ll be taken to your ads manager dashboard where we will take one more step.
Step 5: Duplicate your ad sets
Because we want to reach more than just one group of people, we are going to duplicate the ad set to target a similar audience.
Firstly, click on the name of the campaign you have just created to be taken to the ‘ad set level’.

Then select the ad set you have created by clicking on the tick-box. You’ll see an extra menu bar appear.
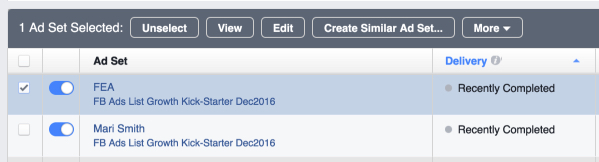
Click on ‘create a similar ad set’. This is where you create a similar audience but you select a different interest. For example, instead of targeting Ten Eyewitness News you could add fans of SBS News, or readers of the Financial Times.
When you create these different audiences, or when you change anything to your ad, make sure you only change one thing at a time so that you can track what works best. Making only one change at a time ensures that you can test the ads properly and truly.
Since this is your first campaign, start with 3 different audiences that you test against each other. Just like we’re doing with the 3 different images.
Once you have created 2 more similar target audiences in the ad sets you click ‘order’ and then we wait.
Step 6: We wait for 24-48 hours
We literally wait. Don’t look at it, don’t touch it. Go do something else.
Step 7: Switch off what doesn’t work
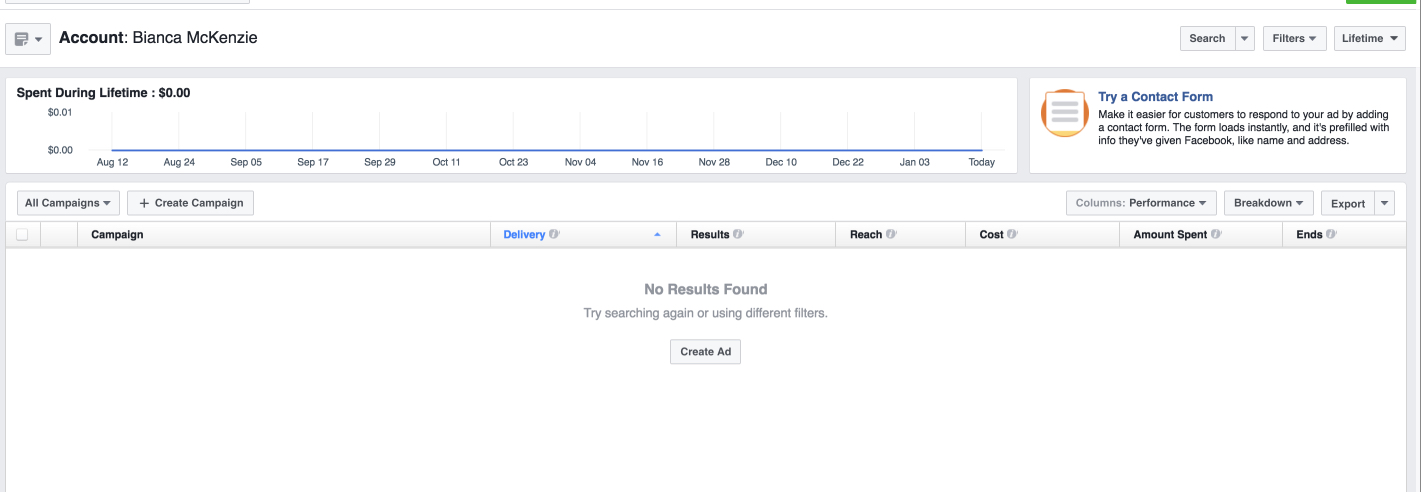
After a minimum of 24 hours you go into ads manager to see how your ads are performing. We will switch off what doesn’t work. Remember that we’re aiming for website traffic here, so that’s what we’ll be measuring. Don’t expect any sales from these ads because that wasn’t the objective we chose when we set them up.
Click on the campaign name so that you land on the ad set level, then click on the name of the ad set to go to the ad level. Here you’ll see three ads with your three different images. Switch off the ones with the least amount of website clicks by dragging the blue bar on the left until it turns grey.
Run your ads for a while longer to get a better idea of the results you can expect. After a week or so you might see that your ads become more expensive, so you’ll want to switch off the campaign by dragging the blue bar.
Pay close attention to your ads results to make sure you’re not spending too much. Especially with a ‘traffic campaign’ you want to make sure that you don’t spend too much since you’re not tracking it against sales so you’re not in control of the full ROI.
It’s a great way to familiarize yourself with Facebook ads.
We’re almost there!
As you can see, Facebook ads can be tricky at first but it’s not rocket science.
With this blog post I hope to have shown you how easy it can be to get your ads up and running. No scary techy stuff just yet, we start easy. If you are keen to learn more, join my Facebook Ads for List Building Training or download your Free Facebook Ads Checklist now.
How will you use this post? Are you going to run your first campaign?
What will you advertise?
I’m curious to know, let me know what your first ad is going to be and what you’re hoping to achieve.


0 Comments